Overview
Ice is a medium that nearly everyone is familiar with. We put it in drinks, skate on it for hockey and scrape it off our windshields in winter. Ice can be turned into sculptures and can even make for some fantastic winter scenery. Ice can also turn into a kaleidoscope of color and patterns under the right circumstances. Science and art collide in the wonder that is ice.
Objectives
The objectives of this lesson are to encourage students to wonder, to see beauty where perhaps they didn’t think any existed and to create a desire to experiment. Students will discover how polarized light can create patterns in thin-section ice.
Lesson Preparation
- Collect materials for experiment and download Lesson Materials.
- Each student/group will need two sheets of polarized filter paper simultaneously.
- Download thin ice sections photos for display for students.
- If you live in an area that has cold winters, it might be a great activity to do outside as it will limit melting of the ice.
Procedure
Day 1: 10 minutes
- Distribute a glass petri dish or paper cup to each student. Have them write their name on their dish/cup.
- Divide them into groups of 4 or 5 students (lab groups work well).
- Each student within the group should fill their dish/cup with differing amounts/depths of water. Full dishes/cups of water will not work well. 1cm, 2cm, 3cm, 4cm…depths are ideal. If freezer space is limited, you could have each group do a single cup with each group having a differing amount of water.
- Place the dishes/cups in the freezer overnight.
Day 2: 45 minutes
- Distribute the polarized filter paper (2 sheets) to each group. Have them experiment with turning the sheets, one on top of the other, to understand how the filters work. Have them experiment when the sheets are at 90˚ angles with respect to one another and various angles in between.
- Have each group/individual grab their dish/cup from the freezer and if using paper cups, QUICKLY peel the paper away from the thin frozen ice.
- Immediately have them sandwich the ice or dish of ice between two sheets of polarized paper at 90˚ angles and place t it on the light box. Have them take a picture with their device.
- You may need to have students do this in waves as melting will occur in warm classrooms.
- After all students have their pictures, have them compare from 1cm depths to thicker ice to see what differences they are able to see.
- Pull up the images of thin section ice as shown below and show the students what possibilities there are.
- Brainstorm ways students might be able to achieve imagery such as what is in the photos.
- Have students sketch/draw or design a “stained” glass window based on the photos of their own thin ice sections or of the ones in the pictures. This could be done with colored tissue paper or colored pencils on paper or other creative ideas.
Extension
- Have students design an experiment to achieve better coloration within their own ice sections. Have them run the experiment to test their results.
- Have students research polarized light and birefringence.
Resources
- An article, by Ted Kinsman, on why ice is colored under polarization can be found here: https://petapixel.com/2017/03/10/use-polarized-lighting-techniques-capture-cool-color-effects/
- Lesson Materials (Rubric for assessment)
Assessment
- “Stained” glass window/picture of their thin section.
- Modifiable rubric included in Lesson Materials.
Author/Credits
Jennifer Bault, 2017, PolarTREC Teacher
jenniferbault [at] nicolet.us
Dr. Pat Langhorne
Otago University, New Zealand
pat.langhorne [at] otago.ac.nz
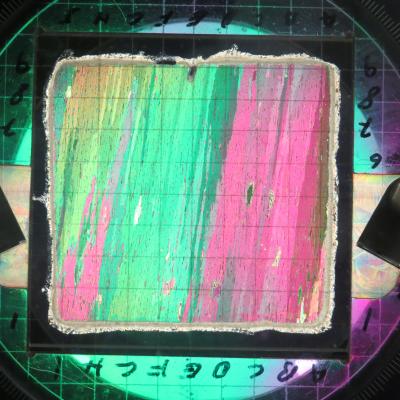 Vibrant colors emerge under polarization
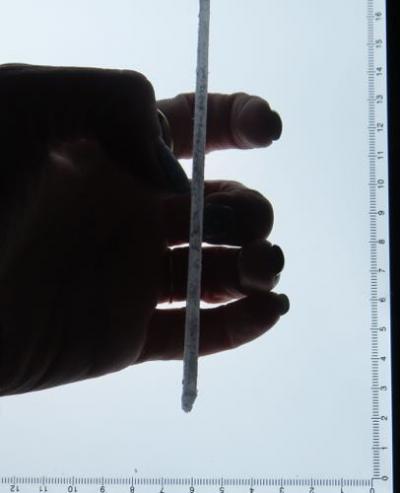 How thin is a thin section?
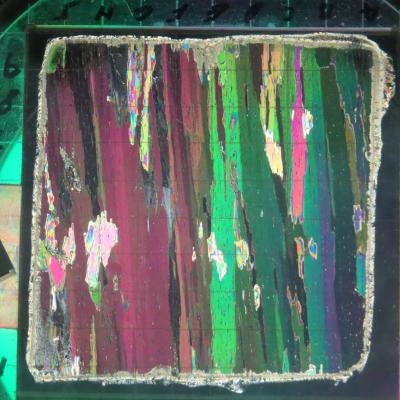 A rainbow of color captured in ice
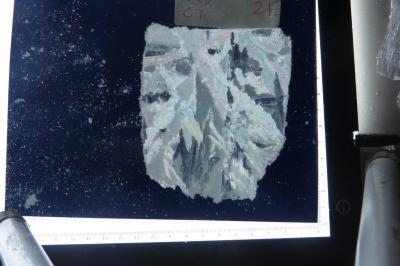 A thin section that is not quite so thin, but still showing some color
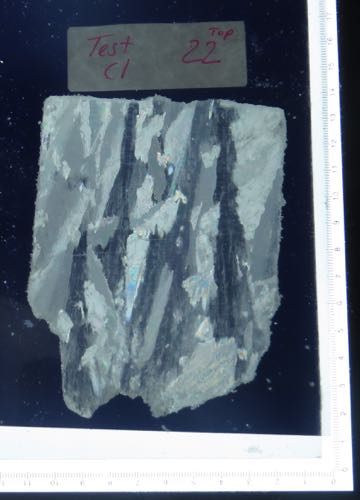 Thin section without much color, but showing ice structure.
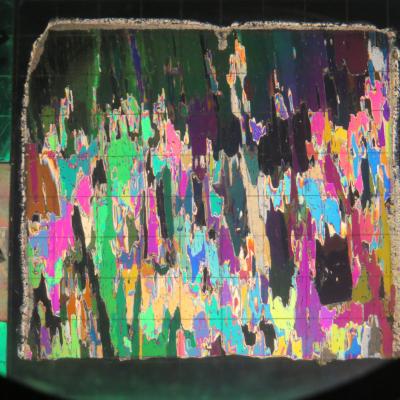 Thin section full of color and wonder
Standards Other
Wisconsin Standards for Environmental Literacy & Sustainability
ELS.C1.C.h Investigate and analyze one’s own curiosities about patterns that emerge from outdoor exploration to develop new questions, draw conclusions, or formulate new ideas or solutions. Reflect and share how one’s perspectives influence personal curiosity, the pursuit of knowledge, and respect for others and the environment.
| Attachment | Size |
|---|---|
| Full Lesson: Beauty of Ice When Art Collides With Science (PDF - 382 KB)382.35 KB | 382.35 KB |
| Lesson Materials (PDF - 70 KB)70.42 KB | 70.42 KB |
